Back in May, we posted a video about how we tested our Gyrochute in iFly’s vertical wind tunnel. We published the video on YouTube... and LinkedIn… Oh, Twitter too! Basically, we shared it on various social media platforms.
If you haven’t watched the video, here’s a hint… it did not end very well. The wings snapped and the tether coiled up. The test failed big time.
A month after, we shared another post saying that we were going back to iFly.
But, on the week we were supposed to go to iFly, the Sydney lockdown happened. So, we waited... And waited.
We blinked and, well, a couple of months have passed.
After what seemed like forever, we are proud to say that we finally did the test!
So, here we are now, writing from our office in Chippendale about how the test went.
But before we go on about our latest iFly test, let’s recap what happened during the first test.
## Recap of Our First iFly Test
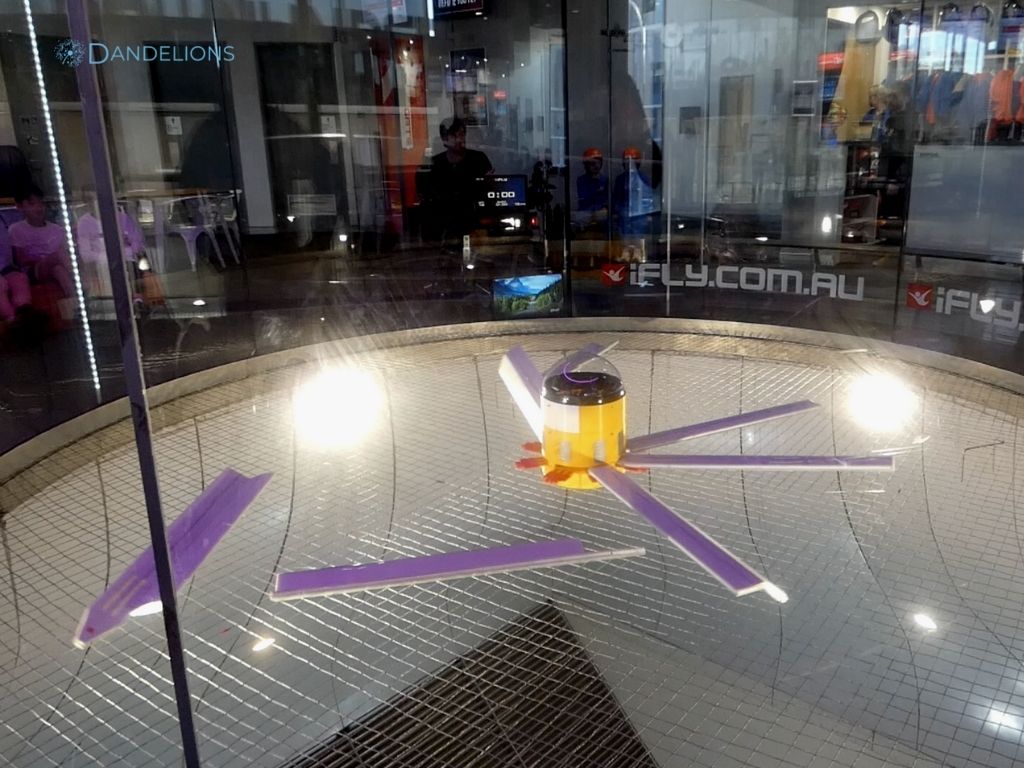
We tested our Gyrochute at iFly, an indoor skydiving facility using a vertical wind tunnel. This vertical wind tunnel allowed us to monitor the Gyrochute’s behaviour in a vertical air column, essentially simulating its behaviour when it would be falling through the sky.
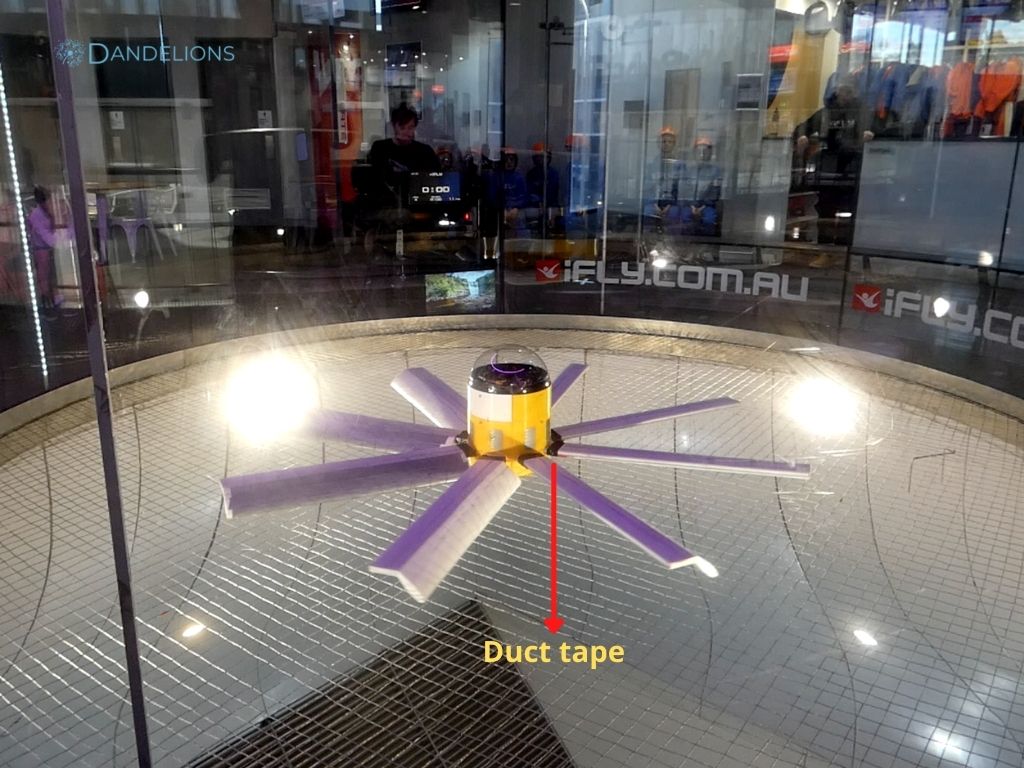
IFly has a supporting mesh net on the bottom of their wind tunnel. When weight is put on it, the net sort of sags a little. Therefore, under the weight of the Gyrochute, the sagging is just enough to cause the blades to touch the net. When the Gyrochute started spinning, the blades snagged on the net and snapped.
Despite the blades snapping, we managed to fix the problem by taping them to the hub with duct tape. The Gyrochute was able to speed up with the blades attached this time.
However, we encountered another issue.
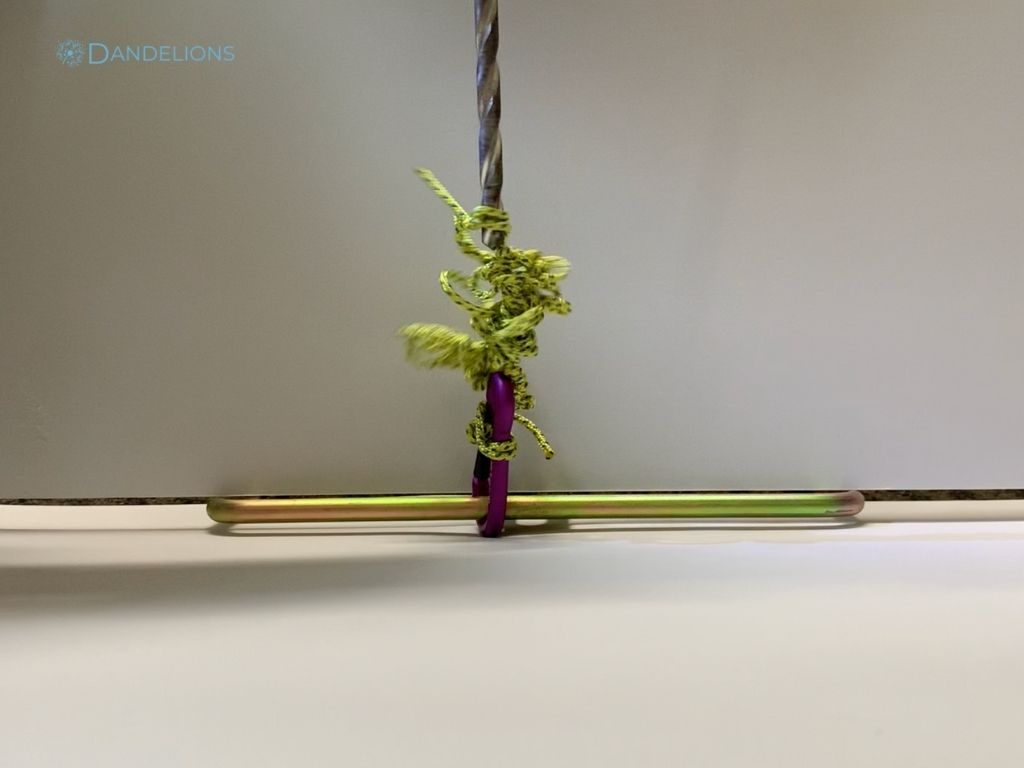
The Gyrochute was tethered to the mesh with a carabiner, swivel hook, and a string. We didn’t realise that the string would wrap around the carabiner… So, when the Gyrochute started spinning, the string coiled up into a ball around the carabiner, leaving the Gyrochute with no slack in the tether to take off.
So, in conclusion, we did validate that the Gyrochute would spin. However, we were not able to see it fly.
Our Plan For The Second iFly Test
The failures from our first test required us to make some changes.

Change Number 1: Giving The Gyrochute A Lift
On our first test, the wings of the Gyrochute snapped because they touched the mesh netting. We realised that the Gyrochute needs a raised platform to spin up without snagging.
Our solution is to use a modified stool. The stool frame will give a height boost to the Gyrochute. In addition, we have also created a custom-made bottom attachment so the Gyrochute can sit on top of the stool and spin nicely.
Change Number 2: Say Goodbye To Coiled Up String
The second problem we had to face was the string coiling up.
The string we used for the first test was a Tendon cord. This cord is flexible, can be braided or twisted, and therefore it coils up easily. So, we replaced the cord with a steel wire rope, which is stronger and offers more torsional resistance. Therefore, it can prevent the tether from coiling.
Change Number 3: New Testing Setup
On our previous test, we left the string piling up underneath the Gyrochute. The combination of this setup and the type of string we used prevented the Gyrochute from flying.
This test uses a variable-length tether that is controlled from outside the wind tunnel. If the Gyrochute needs to fly up, we will lengthen the tether. And if the Gyrochute is flying too high, we will pull it down.
Dandelions’ Second iFly Test
Our objectives for this test are, (a) we wanted to gather data to validate the Gyrochutes flight characteristics, (b) we wanted to see how the redesigned testing apparatus worked in the wind tunnel, and (c) to find out the lowest speed required for the Gyrochute to fly.
In order to do this, we have divided several tasks within the team.
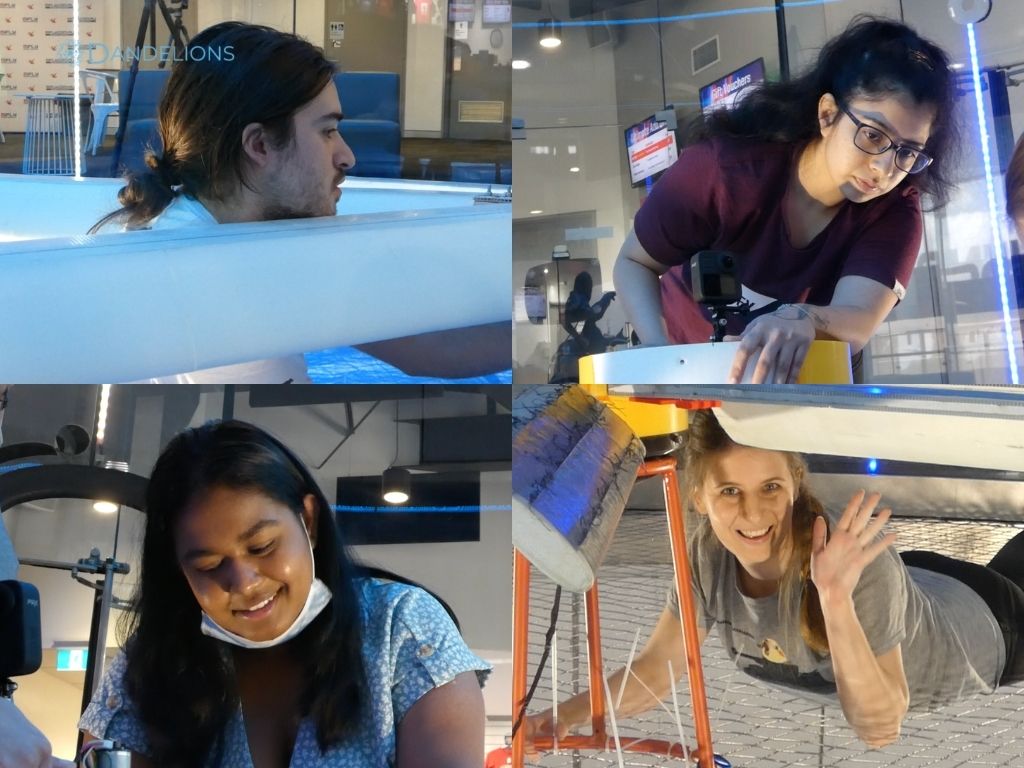
Alex, our Aerospace Engineer, is in charge of regulating the wind tunnel's airspeed.
Vidisha, also our Aerospace Engineer, is monitoring the Gyrochute’s aerodynamic behaviour.
Harindi, our Electrical Engineer, is looking after the electronics and counter-rotating plate.
And Lea, the star of our iFly videos and another brilliant Aerospace Engineer, is in charge of the Gyrochute’s tether system.
Upon our arrival at iFly, we began to assemble the Gyrochute inside the wind tunnel. We brought in the stool, attached the blades to the hub, set up the electronics which include the GPS and camera, and attached the tether system.
And finally, the moment that we have been waiting for…. the test!
So here is what happened, the moment of truth finally came… the Gyrochute started spinning. Suddenly, it felt as if the world was in slow motion.
Everyone had their attention on the Gyrochute.
At this point, our hearts were probably beating at 140 beats per minute.
And then it happened...
The Gyrochute lifted.
The Gyrochute lifted!
It finally lifted!
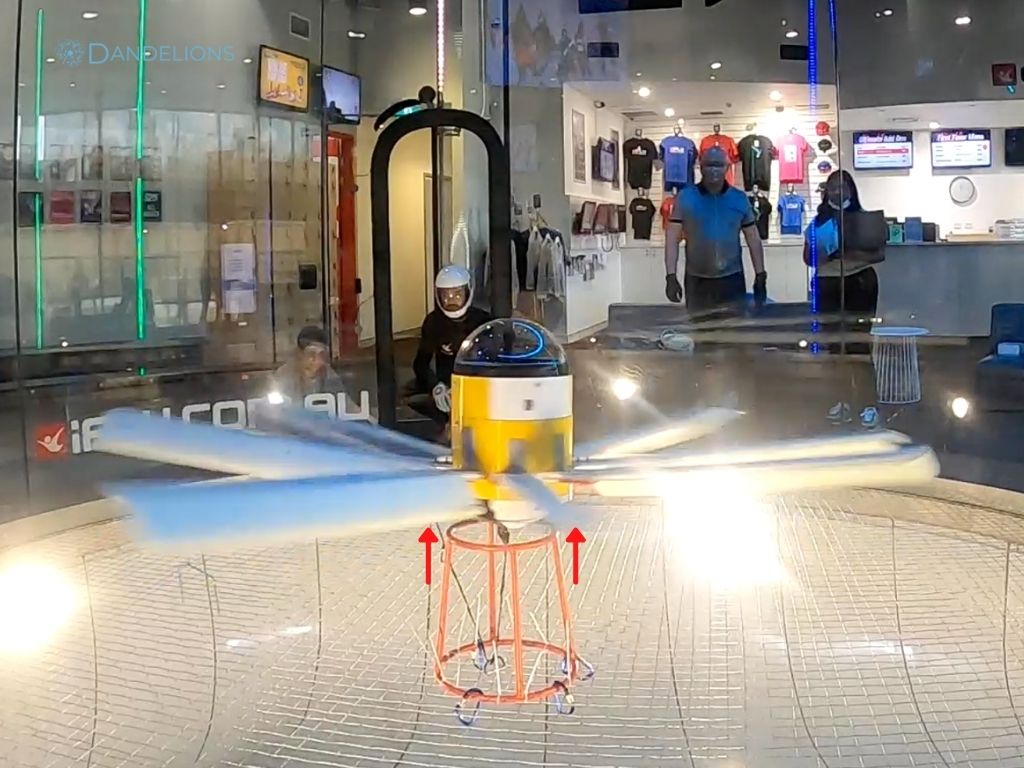
The wings did not snap, the tether did not coil. The Gyrochute really did lift up!
So, we did another round of tests. Well, this time it didn’t go quite as planned but that’s for a different blog post.
We are pretty happy with the results. That’s why we are sharing this good news with you!
Conclusion
To wrap things up, what we did at iFly was to validate the Gyrochute's behaviour in a simulated free-fall environment.
In this test, we were able to determine the descent velocity and rotation rates of the Gyrochute. On top of that, we also validated our electronics and the counter-rotating plate located inside the Gyrochute’s hub.
We would like to thank the lovely team at iFly who helped us make the test possible. We would also like to thank everyone who has supported us - you guys are champions!
We will give more updates about the developments of our Gyrochute, so stay tuned and make sure to visit our site regularly!